legacy u盘安装win10步骤 u盘legacy安装win10系统
更新时间:2023-04-01 12:08:37作者:jiang
多数情况下,我们都是通过uefi来安装win10系统,其实win10系统还支持legacy安装,win10系统兼容旧的启动方式。那么如何用legacy u盘安装win10步骤呢?如果是老电脑,那么制作好legacy启动盘就可以直接装,如果是uefi电脑,则需要先改成legacy模式。接下来就和小编一起来学习下legacy u盘安装win10系统的步骤。
2、下载win10系统镜像:电脑城ghost win10 64位稳定精简版下载v2021.12
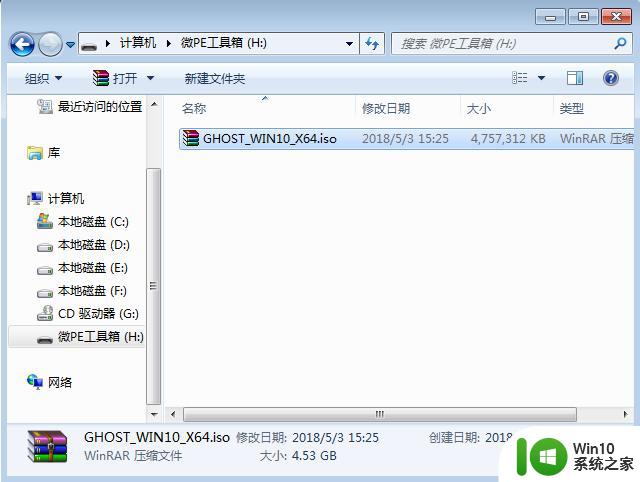
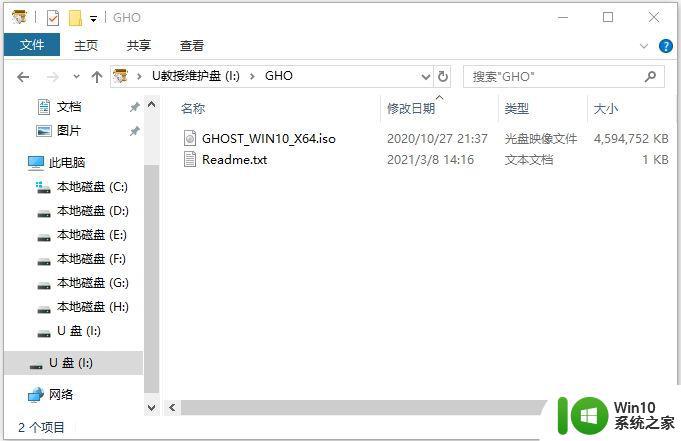
3、制作好U教授U盘启动盘之后,把win10系统镜像直接复制到U盘的GHO目录下
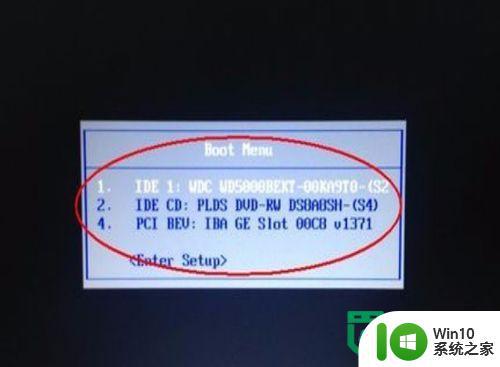
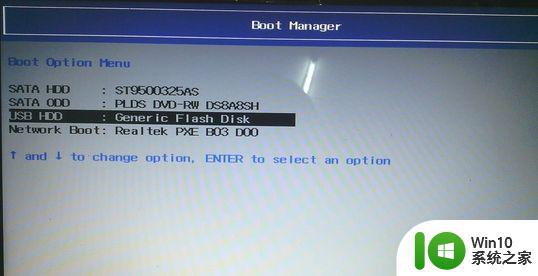
2、调出启动引导菜单选择对话框,选择不含uefi字眼的U盘选项,选择之后按Enter键。
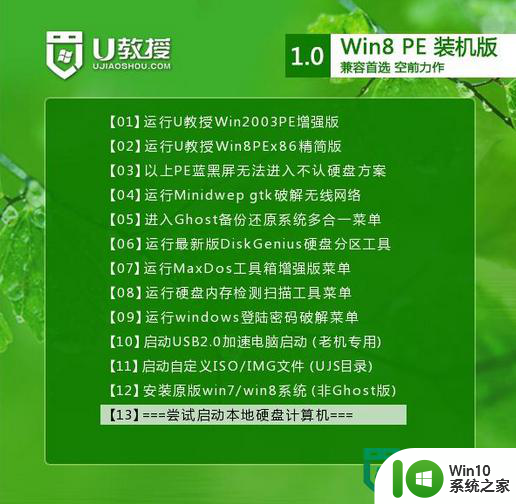
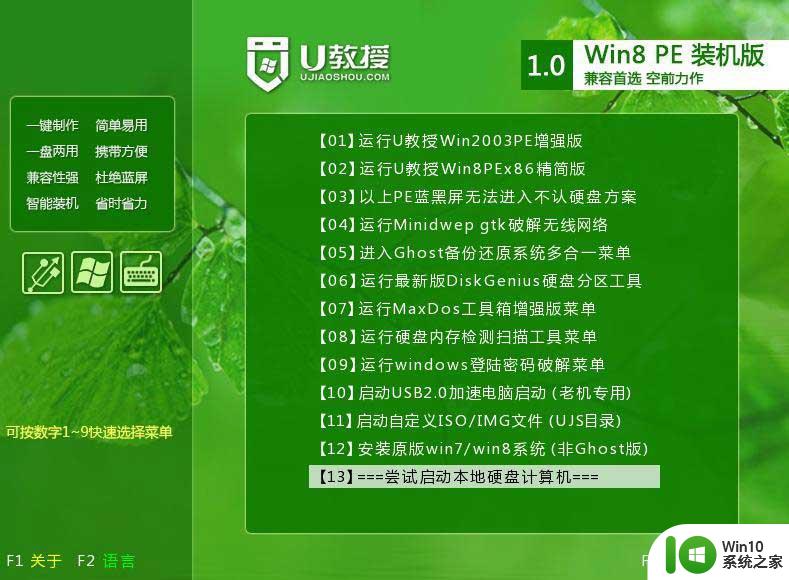
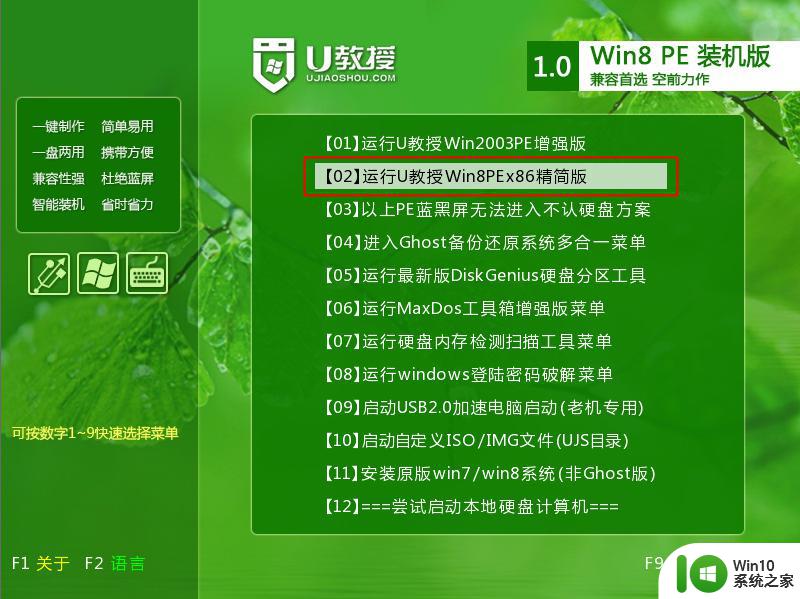
3、电脑会从U盘引导启动进入到U教授主菜单,选择【02】按回车,运行U教授WINPE。
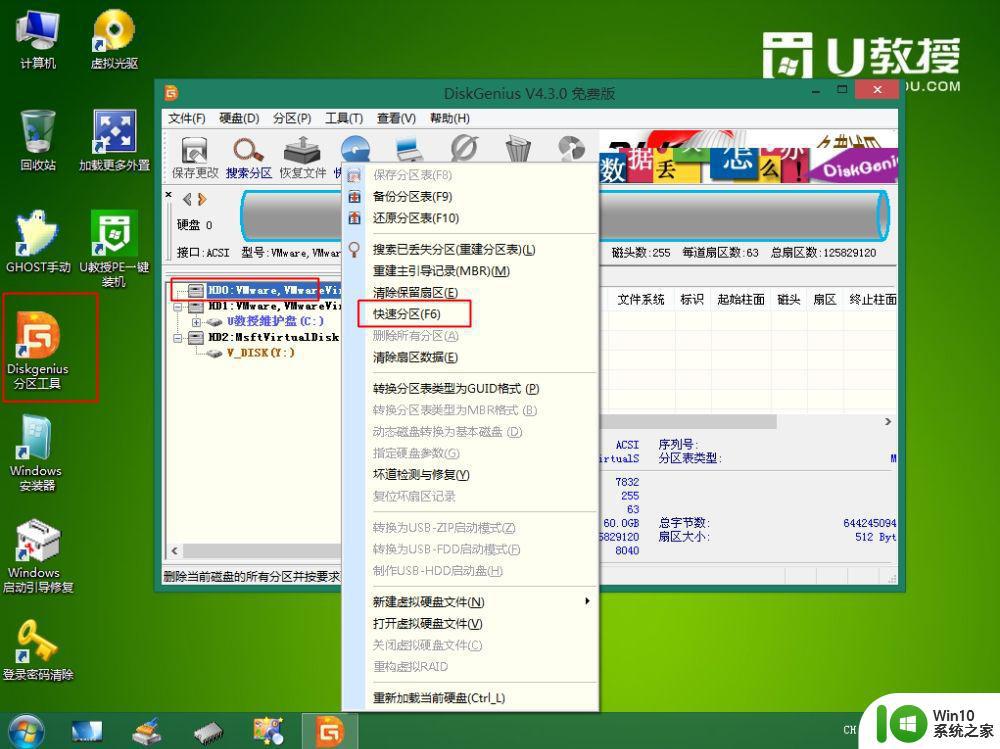
4、进入pe系统环境,双击桌面上的Diskgenius分区工具,然后选择硬盘,右键点击【转换分区表类型为mbr格式】(legacy安装系统要采用mbr分区表),保存更改(如果如下图所示显示灰色,表示已经是mbr格式,不需要转换)。接着右键硬盘选择【快速分区】。
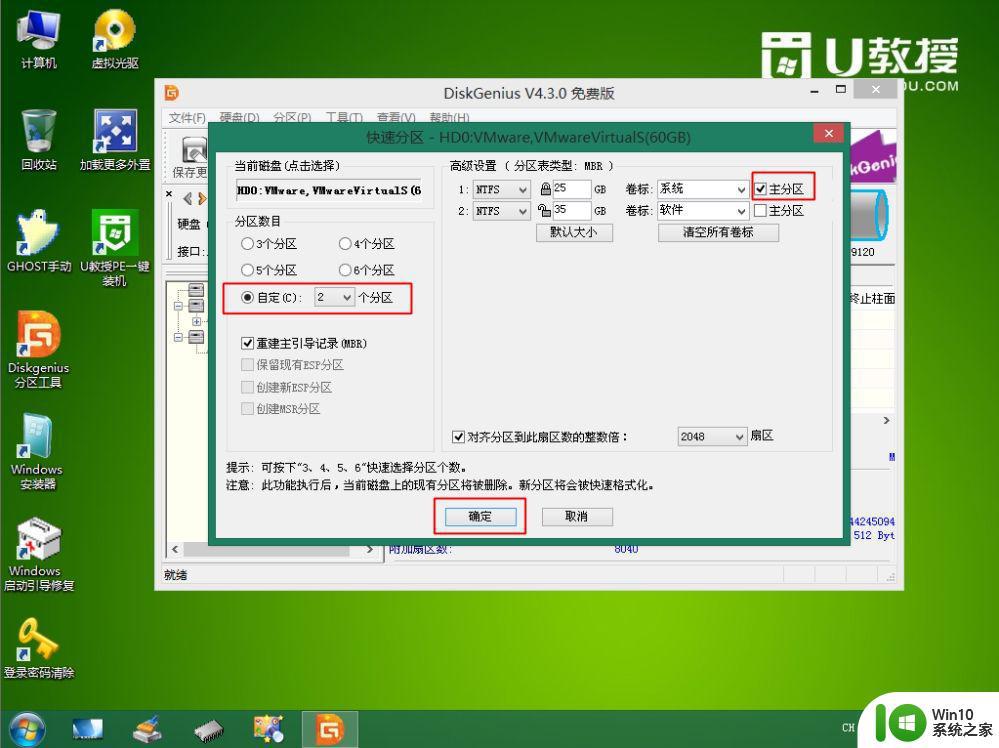
5、根据硬盘的大小来选择分几个盘,一般C盘建议60G以上,建议100G,卷标【系统】的盘符要勾选【主分区】,用于安装系统,还需勾选【对齐分区到此扇区数的整数倍】,表示4k对齐,点击确定。
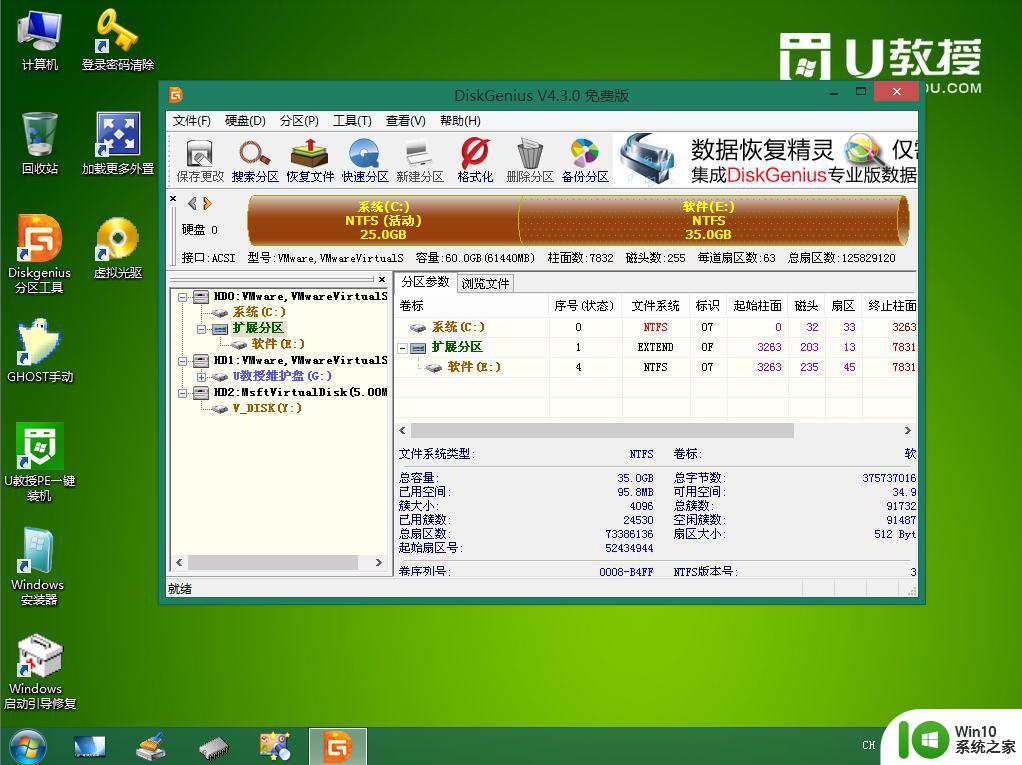
6、点击确定后执行硬盘分区操作。
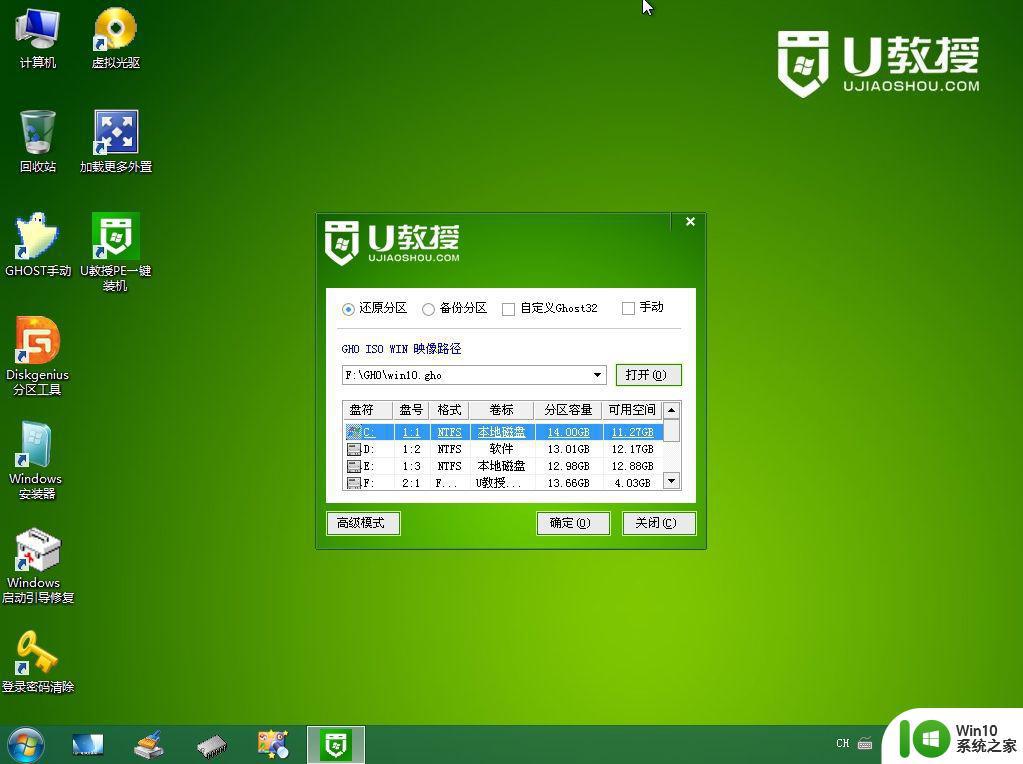
7、分区好之后,双击打开【U教授PE一键装机】,打开放在U盘的win10系统镜像文件win10.gho,接下来选择安装盘符,一般是C盘,选好之后,点击确定。
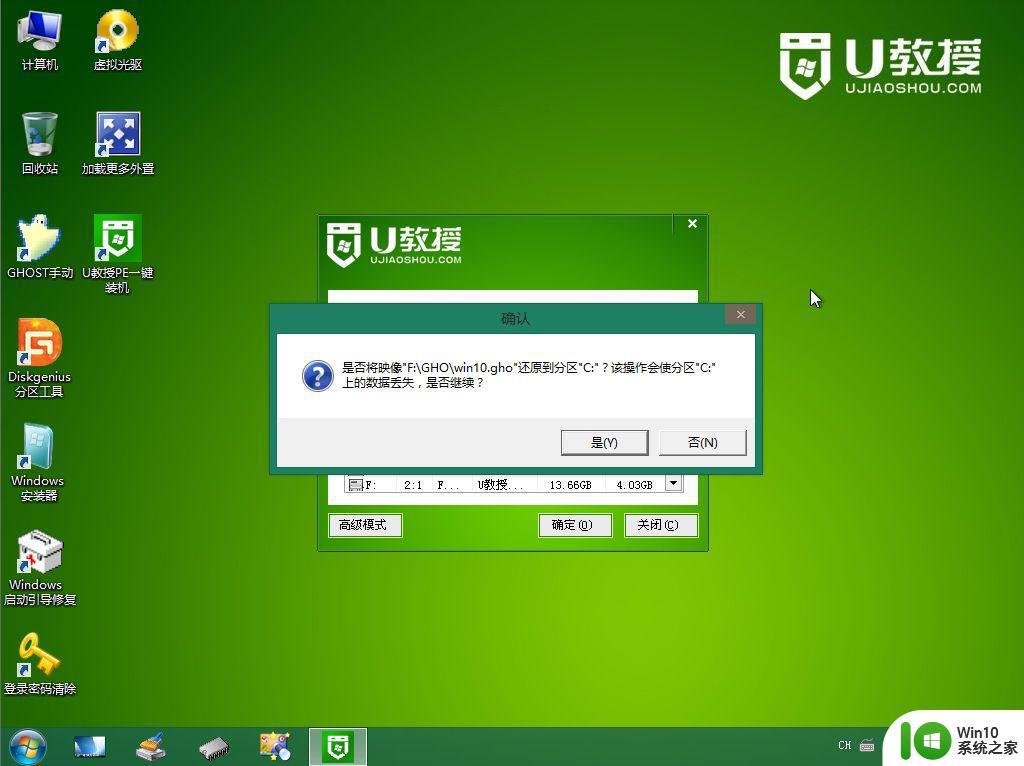
8、弹出提示框,提醒用户后面操作会使C盘数据丢失,确认无误后,点击是。
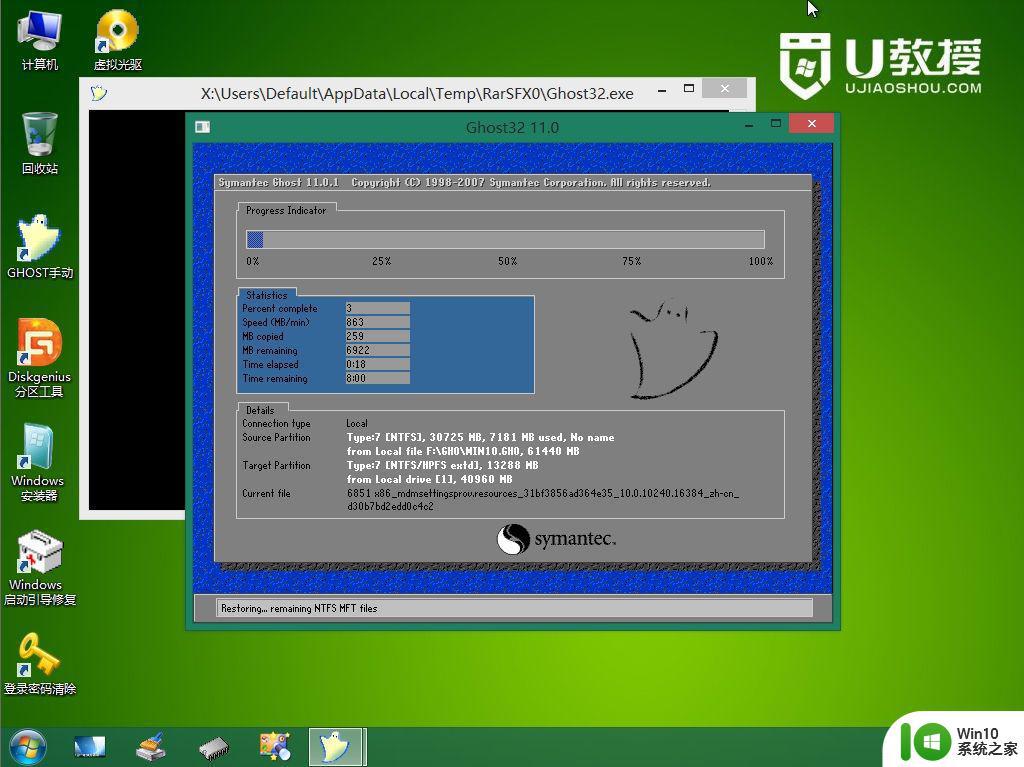
9、转到这个界面,执行win10系统安装部署过程。
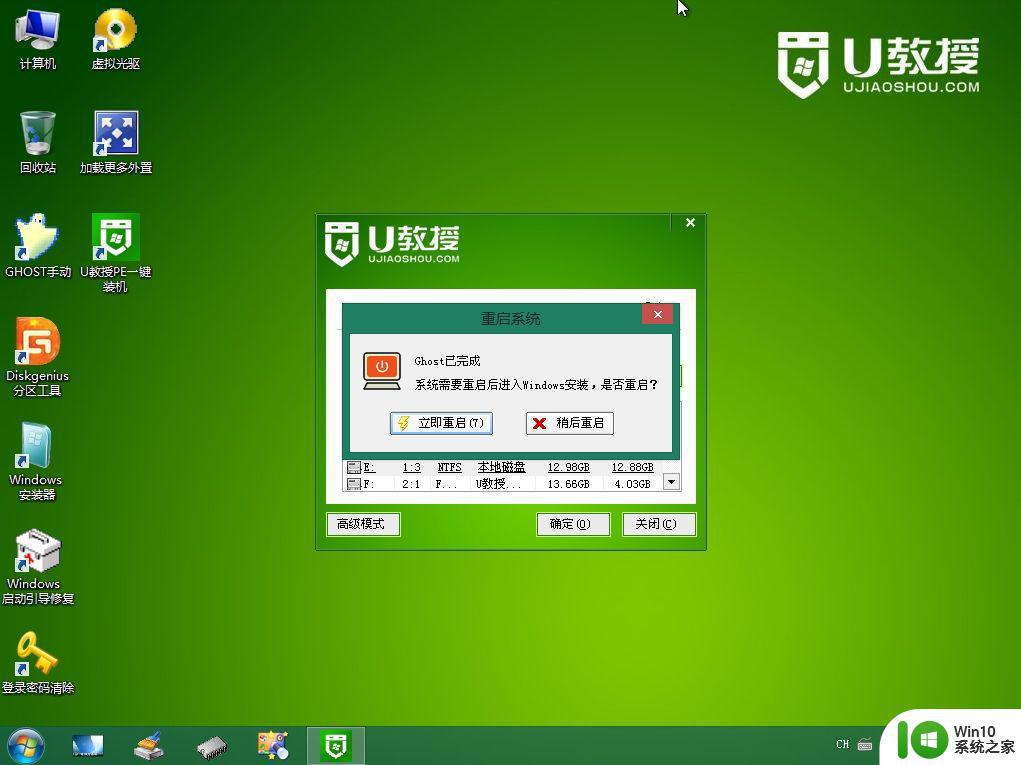
10、ghost完成之后,点击立即重启,重启过程中要拔出U盘。
11、重启进入到这个界面,执行win10系统安装过程,包括系统组件安装、驱动安装、系统设置以及系统激活等操作。

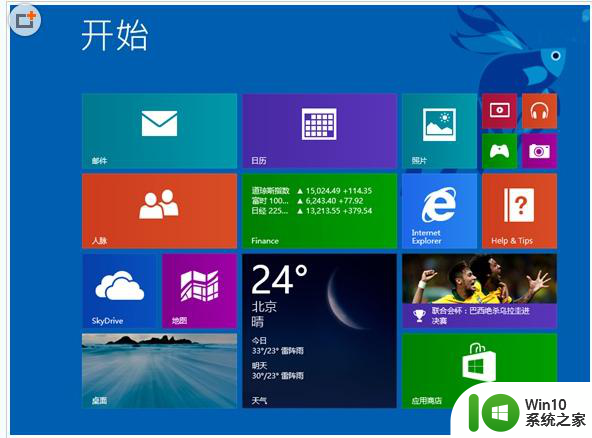
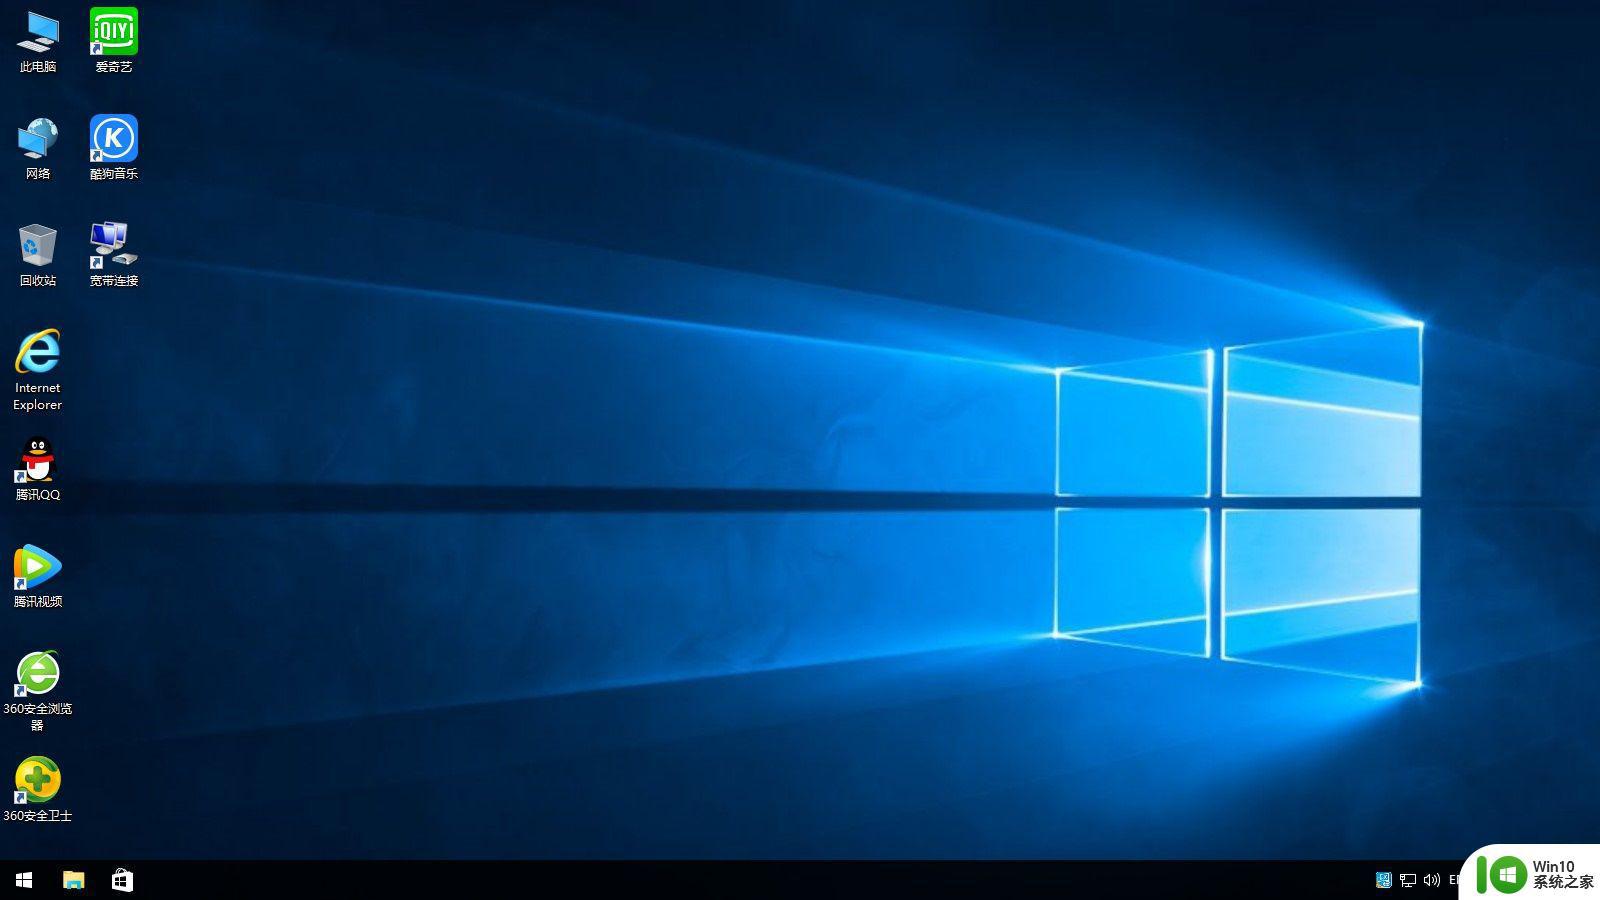
12、在启动进入全新win10界面之后,系统就安装好了。
以上就是使用legacy u盘安装win10步骤的完整过程,需要注意的一点就是,legacy安装系统要把硬盘改成mbr分区表,否则系统安装后不能正常启动。
一、安装准备
1、准备一个8G容量U盘:u盘制作成legacy启动盘方法2、下载win10系统镜像:电脑城ghost win10 64位稳定精简版下载v2021.12
3、制作好U教授U盘启动盘之后,把win10系统镜像直接复制到U盘的GHO目录下
二、legacy u盘装win10系统步骤如下
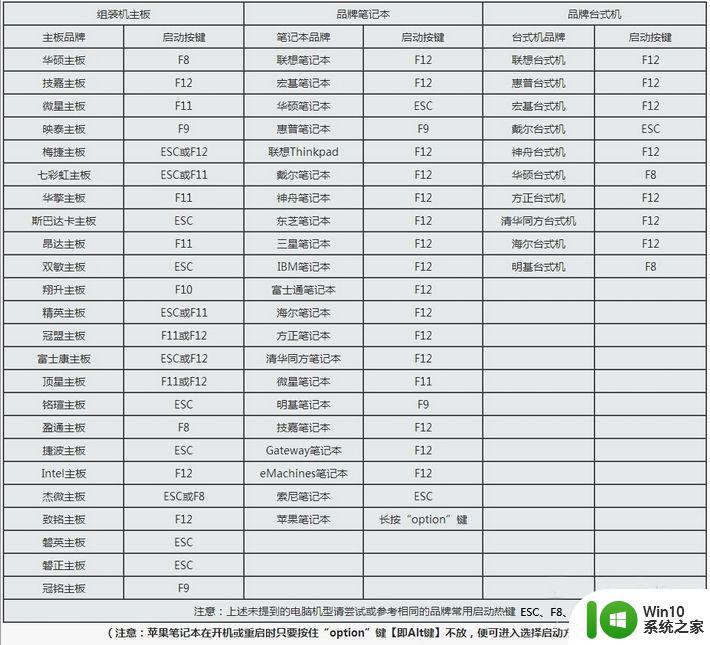
1、在需要安装win10系统的电脑上插入legacy启动盘,如果默认是uefi模式的电脑,需要先进bios改成legacy引导,点击查看:怎么设置legacy启动。改完bios之后按F10保存重启,如果是老旧机型,则不需要修改,因为默认就是legacy启动。在启动过程中,不停按F12或F11或Esc等启动热键。2、调出启动引导菜单选择对话框,选择不含uefi字眼的U盘选项,选择之后按Enter键。
3、电脑会从U盘引导启动进入到U教授主菜单,选择【02】按回车,运行U教授WINPE。
4、进入pe系统环境,双击桌面上的Diskgenius分区工具,然后选择硬盘,右键点击【转换分区表类型为mbr格式】(legacy安装系统要采用mbr分区表),保存更改(如果如下图所示显示灰色,表示已经是mbr格式,不需要转换)。接着右键硬盘选择【快速分区】。
5、根据硬盘的大小来选择分几个盘,一般C盘建议60G以上,建议100G,卷标【系统】的盘符要勾选【主分区】,用于安装系统,还需勾选【对齐分区到此扇区数的整数倍】,表示4k对齐,点击确定。
6、点击确定后执行硬盘分区操作。
7、分区好之后,双击打开【U教授PE一键装机】,打开放在U盘的win10系统镜像文件win10.gho,接下来选择安装盘符,一般是C盘,选好之后,点击确定。
8、弹出提示框,提醒用户后面操作会使C盘数据丢失,确认无误后,点击是。
9、转到这个界面,执行win10系统安装部署过程。
10、ghost完成之后,点击立即重启,重启过程中要拔出U盘。
11、重启进入到这个界面,执行win10系统安装过程,包括系统组件安装、驱动安装、系统设置以及系统激活等操作。
12、在启动进入全新win10界面之后,系统就安装好了。
以上就是使用legacy u盘安装win10步骤的完整过程,需要注意的一点就是,legacy安装系统要把硬盘改成mbr分区表,否则系统安装后不能正常启动。